As a creative individual, I’m always on the lookout for tools that can help me generate innovative and imaginative content. Recently, I found the CLIP Interrogator, a fascinating tool that harnesses the power of OpenAI’s CLIP and Salesforce’s BLIP to optimize text prompts for matching images.
In this article, I’ll walk you through the process of installing CLIP Interrogator locally and using it to generate prompts for your creative projects.
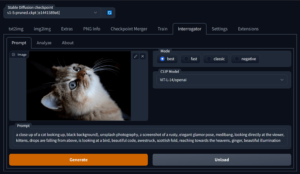
What is a CLIP Interrogator?
Before we dive into the installation and usage, let’s take a moment to understand what CLIP Interrogator is all about. CLIP Interrogator is a prompt engineering tool that combines the capabilities of two powerful AI models: CLIP and BLIP. The primary goal of CLIP Interrogator is to help you optimize text prompts for matching a given image.
CLIP Interrogator assists you in generating prompts that can be used with text-to-image models, such as Stable Diffusion on DreamStudio. By creating precise prompts, you can produce art, design, and content that resonates with the image you have in mind.
Now that we have an understanding of what CLIP Interrogator does, let’s proceed with the installation and setup.
Prerequisites:
Before starting the installation, I ensured my system met the necessary prerequisites. This included having Python installed, as CLIP Interrogator is a Python-based tool.
I also checked that I had pip (Python’s package installer), Git for cloning the repository, and virtualenv for creating a virtual environment.

Installing CLIP Interrogator Locally
To get started with CLIP Interrogator, we’ll need to install it locally on our machine. The tool is available as a Python library and can be easily integrated into your projects.
Follow these steps to set it up:
Step 1: Create a Python Virtual Environment
First, we need to create a Python virtual environment to isolate the installation and avoid conflicts with other packages.
Open your terminal or command prompt and run the following command:
python3 -m venv ci_envFor Linux users, activate the virtual environment using:
source ci_env/bin/activateFor Windows users, activate the virtual environment using:
.\ci_env\Scripts\activateStep 2: Cloning the Repository
The first actual step was to clone the repository from GitHub. I opened my terminal and navigated to the directory where I wanted to install CLIP Interrogator.
Then, I ran the following command:
git clone https://github.com/pharmapsychotic/clip-interrogator.git
This command cloned the repository into a folder named clip-interrogator in my chosen directory.
Step 3: Install Dependencies
CLIP Interrogator requires certain dependencies to function correctly.
We need to install them, including the essential PyTorch library with GPU support. Run the following commands:
pip3 install torch torchvision --extra-index-url https://download.pytorch.org/whl/cu117
pip install clip-interrogator==0.5.4
If you want to use the latest work-in-progress version with BLIP2 support, you can install it with:
pip install clip-interrogator==0.6.0Step 4: Test the Installation
To ensure that the installation was successful, let’s create a small Python script and test CLIP Interrogator. Here’s an example script:
from PIL import Image
from clip_interrogator import Config, Interrogator

# Load an image
image = Image.open(image_path).convert('RGB')

# Create an Interrogator instance
ci = Interrogator(Config(clip_model_name="ViT-L-14/openai"))

# Interrogate the image and print the results
print(ci.interrogate(image))
Replace image_path with the path to the image you want to interrogate.
Running this script should demonstrate that the CLIP Interrogator is working correctly.
Configuration Options:
CLIP Interrogator provides various configuration options to tailor its behavior to your needs. You can configure it using the Config object. Here are some important configuration parameters:
clip_model_name: Specifies which pretrained CLIP model to use. For Stable Diffusion 1.X, use “ViT-L-14/openai.” For Stable Diffusion 2.0, use “ViT-H-14/laion2b_s32b_b79k.”
cache_path: Defines the path where pre-computed text embeddings are saved.
download_cache: When set to True, CLIP Interrogator will download precomputed embeddings from HuggingFace.
chunk_size: Specifies the batch size for CLIP processing; you can use smaller values if you have limited VRAM.
quiet: When set to True, no progress bars or text output will be displayed during processing.
If you have a system with low VRAM, you can call config.apply_low_vram_defaults() to reduce the VRAM usage, although this may come at the cost of processing speed and quality.
The default settings consume about 6.3GB of VRAM, while the low VRAM settings use about 2.7GB.
Using CLIP Interrogator in Your Projects
Now that we have CLIP Interrogator installed and configured, let’s explore how you can use it in your creative projects. Here are a few examples of how you can leverage this tool:
1. Generating Art Prompts
If you’re an artist or designer, you can use CLIP Interrogator to generate prompts for creating artwork that matches a specific image.
Simply load your image, create an Interrogator instance with the desired configuration, and call interrogate(image) to get a prompt tailored to your image.
2. Ranking Against a List of Terms
With CLIP Interrogator, you can also rank images against your own list of terms. This feature is available starting from version 0.6.0. Here’s an example of how to do it:
from clip_interrogator import Config, Interrogator, LabelTable, load_list
from PIL import Image

# Create an Interrogator instance with BLIP disabled
ci = Interrogator(Config(blip_model_type=None))

# Load an image
image = Image.open(image_path).convert('RGB')

# Create a LabelTable with your list of terms
table = LabelTable(load_list('terms.txt'), 'terms', ci)

# Rank the image against the terms and print the best match
best_match = table.rank(ci.image_to_features(image), top_count=1)[0]
print(best_match)
Replace 'terms.txt' with the path to your own list of terms. This allows you to find the best-matching term for a given image, which can be valuable for categorization and labeling.
Conclusion
The CLIP Interrogator is a powerful tool that empowers creative individuals and developers to enhance their projects by generating tailored prompts for images. With its easy installation process and versatile configuration options, you can integrate it into your projects seamlessly.
Whether you’re an artist looking to create stunning visual art, a designer aiming to match your designs with specific images, or simply curious about the creative potential of AI, CLIP Interrogator has something to offer.